Once the first prototype was build, it was necessary to duplicate it in order to get our two rival robots ready to compete and be tested by those of us who needed them for some tests. To get a good idea of what they should finally look like and have all the functionalities ready, we mounted in front of them a wheel on a pole supposed to be the mean with which a Counter Terrorist Unit (CTU) would push the IR Ball away from the bomb unit.
 |
| Picture 12 : Two working prototypes, waiting for the first tests |
One thing among many others we have learned through this course is the importance and impact of the physical world one the programming and the final results when we deal with robots. It was therefore mandatory to take our time considering every aspect of our final robot and try to first fix a problem on the actual robot before looking into the code.
Since the first person view with the camera embedded in the phone is a critical part of the gameplay, it was deemed necessary that we spent some time tuning its position on the robot.
While trying our early version of the program and moving a robot using the video stream on a computer screen, it appeared that having the camera facing a little upward was not a so good idea. Even if it enabled the player to see more of the surrounding environment and buildings, and let him have a clear shot on the bomb, it revealed to be hard driving the robot around.
It is indeed necessary to see as much ground as possible at the same time, to make sure you are running into a low obstacle, and to take better decision while making a turn. This is eventually more intuitive to drive with a camera facing straight in front of you, since it reminds you of driving a real car.
We refer to the pole as the LEGO wheel mounted on the end of the forward facing pole. The purpose of this element made for the CTU is to push the IR Ball from the bomb unit in order to get the defuse sequence. To get the good position of this pole, we first had to make sure it was on the same level as the IR Ball. On top of that, it had to be built such as it is not in the camera field of view. This last constraint was also considered while building the bomb unit.
The second thing that has to be taken into account was the centering of the pole in connection to the position of the camera. The camera was already horizontally centered in order to get a better feeling of the driving – so has to be the pole. Indeed, since we cannot see it with the camera, and since the camera is not oriented upward, when the robot is close in front of the bomb, the user can almost not see the IR Ball (see figure below). We therefore had to make sure that the player can always assume he is pushing the ball with the pole when his robot is in front of the bomb and his camera is centered on the bomb itself.
 |
| Picture 13 : The actual point of view of the CTU while approaching the bomb and being a few centimeters away from pushing the IR Ball |
The goal of the Infrared Seeker is to provide the player with the position of the bomb if the IR Ball is in range of the sensor, whereas the camera may still not have located the bomb. This is a really useful data for the CTU player insofar its first person view is quite limited because it is facing forward with a short angle of view, while the IRSeeker can see the ball with an angle of 240° and roughly locate it in one of nine directions, as shown on the figure below[1].
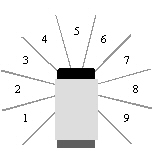 |
| Picture 14 : IRSeeker directions (1 is on the left, 9 on the right, and 0 means no signal) |
The IRSeeker sensor is really efficient while used with the IR Ball in modulated mode (AC), even when it is 10 meters far away from it. HiTechinc states:
The sensor will detect modulated IR signals such as those from the HiTechnic IRBall or some IR remote controls. In Modulated mode the sensor will filter out most other IR signals to decrease interference from lights and sunshine for example. The sensor is tuned to square wave signals at 1200Hz.
The obvious position for the sensor on the robot is clearly that it has to be on the same level of the IR Ball and has to have most of its surroundings cleared from any other element of the robot, to be able to detect the ball from most of the nine available directions. It has been placed on top of the phone, a bit shift on the left of the robot center.
The Ultrasound sensor (US Sensor) has been mounted on a rotating turret to detect obstacles, as previously described in the report. Our first testing with the radar widget that displays the surrounding obstacles on the player screen in real time showed us that it detected the pole in front of it. We therefore had to raise it so it was not the case anymore, while making sure that the wires were not interfering with the rotation of the US Sensor and that it did not make it work more loosely.
The idea of integrating a compass sensor on each robot came when we were designing the radar widget. It seemed indeed appropriate to indicate to the player its current direction so he could have a good idea of where the obstacles really are on the radar, on top of knowing approximately where he is on the battlefield. For this purpose, we show on the static map displayed on the screen where north is, while a moving arrow shows north from the robot point of view.
A compass sensor may be one of the most difficult sensors to place on a robot, because of the magnetic interferences produced by the motors and the NXT brick. As it was first mounted on top of the NXT and one the same level as the motor rotating the US Sensor, we saw in our experiments that there was a “black spot” on the compass display, i.e. an angle of about 90° in which north was not detected at all. It was then necessary to place it higher and as far as possible from any electronic device. Once this was done, the sensor worked perfectly as expected.
The running environment of our robots calls for robust robots able to sustain potential damages due to them running into each other or in the buildings. They also have to endure long runs and many rounds of game before needed to be fixed – which is not always easy when we deal with LEGO (but far from being impossible !). Phone carriage boxes have therefore been reinforced and are no longer loosely attached. The pole is mounted so it keeps its horizontality and does not break or bend too much or too easily despite its length while running into the ball.
Tracks are made so they keep parallel and do not work loose as long as possible.
 |
Picture 15 : Final version with all the sensors. From left to right: IRSeeker, Compass sensor and US Sensor. |
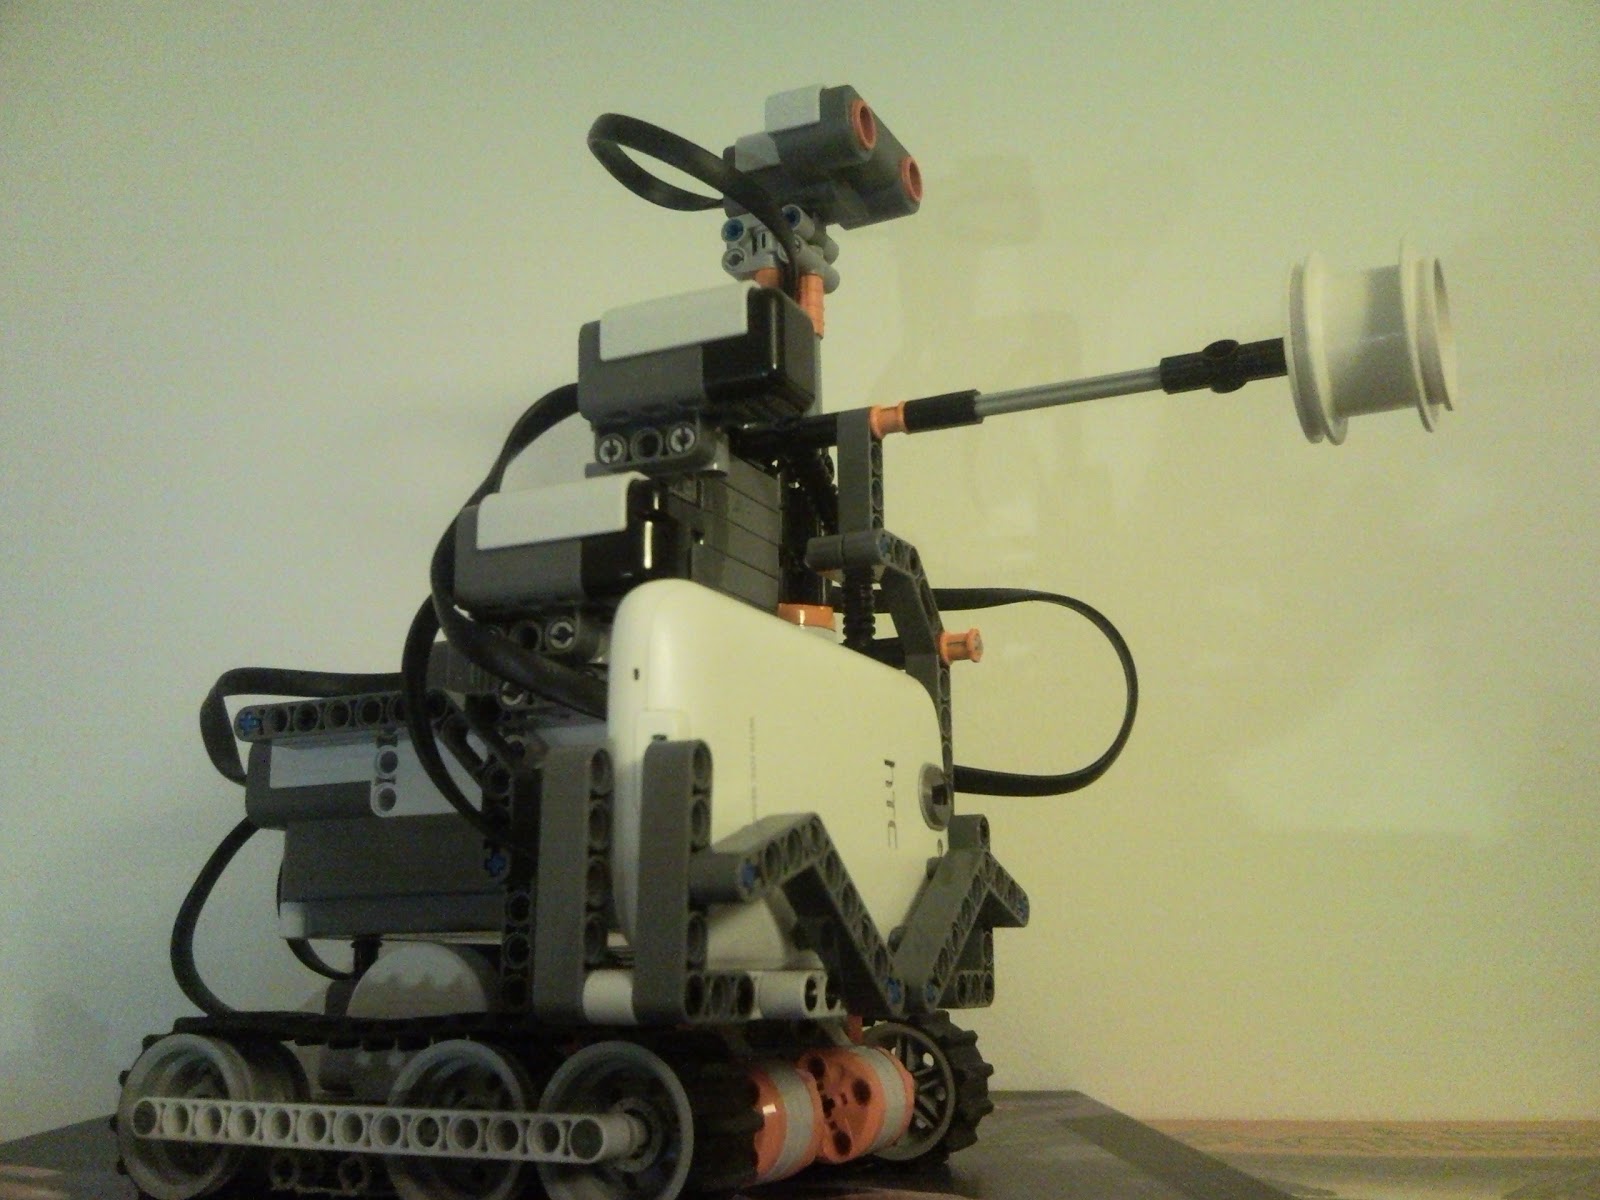 |
Picture 16: Final version with the HTC phone. |
[1] Information provided by the HiTechnic webpage which sells this sensor : http://www.hitechnic.com/cgi-bin/commerce.cgi?preadd=action&key=NSK1042
No comments:
Post a Comment